Android Getting Started with Firebase – Push Notification
Firebase is a mobile and web application development platform that permits you to make web applications with no server-side programming so that development turns out to be quicker and easier. With Firebase. Firebase push notification is easy to use, we will build a simple project here.
Firebase supports the web, iOS, and Android. Applications using Firebase can just use and control data, without having to think about how data would be stored, and synchronized across various examples of the application in real-time. There is no need to write server-side code or deploy a complex server framework to get an app started with Firebase.
As part of Mobile App Development Services, Firebase offers a robust solution for building scalable and efficient mobile apps with ease.
Prerequisites
- Android’s version should be 2.3 or newer with Google Play services 9.2.1 or newer
- Android Studio should be greater than 1.5.
- An Android Studio project and its package name (The package name in ApplicationManifest.xml).
Add Firebase to your application
- Create an accounton Firebase.
- Create a project inFirebase console.
- Click Firebase for Android app and follow the instructions.
- When prompted, enter app’s package name.
- Download google-services.json file.
- Place the google-services.json file in your app’s module folder. Typically /app.
1. First thing you need to do is go to https://console.firebase.google.com/ and make an account to gain access to their console. After you gain access to the console you can start by creating your first project.
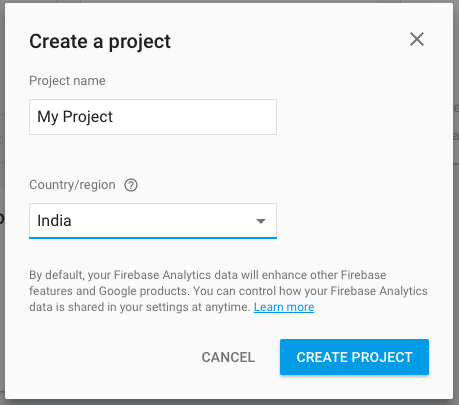
(a.) Click Add Project

(b.) Give a project name and select your country then Click Create Project.

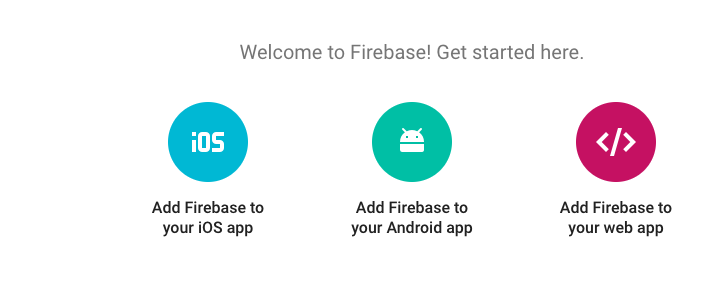
(c.) Select Add Firebase to your Android App

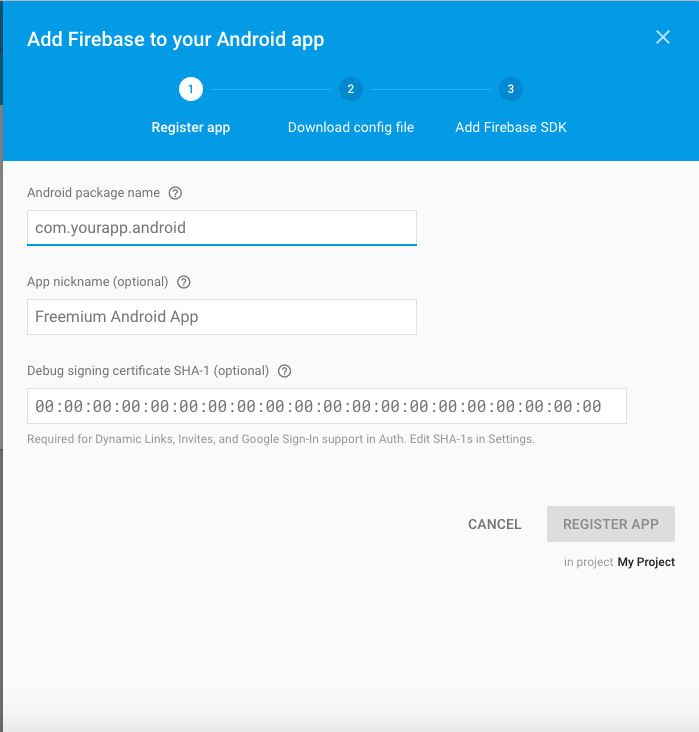
(d.)Give the package name of your project (mine is com.test.firebase) in first field, second option your app nickname and then add Debug signing certificate SHA-1.

(e.) Here you are looking the google-services.json file, Paste the google-services.json file to your project’s app folder. This step is very important as your project won’t build without this file.
2. Create a new project in Android Studio from File ⇒ New Project. When it prompts you to select the default activity, select Blank Activity and proceed.
While filling in the project details, use the same package name that you gave in the Firebase console. In my case, I am using the same com.test.firebase.
3. Now open the build.gradle located in the project’s home directory and add firebase dependency.
dependencies { compile fileTree(dir: 'libs', include: ['*.jar']) testCompile 'junit:junit:4.12' compile 'com.android.support:appcompat-v7:23.4.0' compile 'com.google.firebase:firebase-messaging:9.6.1' compile 'com.google.firebase:firebase-auth:9.6.1'}4. Open app/build.gradle and add firebase auth dependency. At the very bottom of the file, add apply plugin: ‘com.google.gms.google-services’
dependencies { classpath 'com.android.tools.build:gradle:2.0.0' //Add this line classpath 'com.google.gms:google-services:3.0.0' // NOTE: Do not place your application dependencies here; they belong // in the individual module build.gradle files}
5. Open AndroidManifest.xml and add this code
<?xml version="1.0" encoding="utf-8"?><manifest xmlns:android="http://schemas.android.com/apk/res/android" package="com.test.firebase"> <uses-permission android:name="android.permission.INTERNET"/> <application android:allowBackup="true" android:icon="@mipmap/ic_launcher" android:label="@string/app_name" android:supportsRtl="true" android:theme="@style/AppTheme"> <activity android:name=".MainActivity"> <intent-filter> <action android:name="android.intent.action.MAIN" /> <category android:name="android.intent.category.LAUNCHER" /> </intent-filter> </activity> <service android:name=".MyFirebaseMessagingService"> <intent-filter> <action android:name="com.google.firebase.MESSAGING_EVENT"/> </intent-filter> </service> <service android:name=".MyFirebaseInstanceIDService"> <intent-filter> <action android:name="com.google.firebase.INSTANCE_ID_EVENT"/> </intent-filter> </service> </application></manifest>
6. Create Constants.javafile in util folder.
package com.test.firebase.utils;public class Constants { public final static String BASE_URL = ""; public final static String PREF_FILE_NAME = "firebase"; public final static String FIREBASE_TOKEN = "firebase_token";}
7. Create DevicePreferences.javafile in util folder.
package com.test.firebase.utils;import android.content.Context;import android.content.SharedPreferences;public class DevicePreferences { public SharedPreferences get(Context context) { return context.getSharedPreferences(Constants.PREF_FILE_NAME, Context.MODE_PRIVATE); } public void addKey(Context context, String key, String value) { SharedPreferences settings = get(context); SharedPreferences.Editor editor = settings.edit(); editor.putString(key, value); editor.commit(); } public String getString(Context context, String key) { SharedPreferences prefs = get(context); return prefs.getString(key, null); }}
8. Create xml file name like thisactivity_main.xml.
<?xml version="1.0" encoding="utf-8"?><LinearLayout xmlns:android="http://schemas.android.com/apk/res/android" xmlns:tools="http://schemas.android.com/tools" android:layout_width="match_parent" android:layout_height="match_parent" android:gravity="center" android:orientation="vertical" tools:context="com.test.firebase.MainActivity"> <Button android:id="@+id/buttonLogin" android:layout_width="wrap_content" android:layout_height="wrap_content" android:gravity="center" android:text="Generate Token" /></LinearLayout>
9. Create activity file name like this MainActivity.java.
package com.test.firebase;import android.support.annotation.NonNull;import android.support.v7.app.AppCompatActivi

ty;import android.os.Bundle;import android.util.Log;import android.view.View;import android.widget.Button;import android.widget.EditText;import android.widget.Toast;import com.google.android.gms.tasks.OnCompleteListener;import com.google.android.gms.tasks.Task;import com.google.firebase.auth.FirebaseUser;import com.google.firebase.auth.GetTokenResult;import com.google.firebase.auth.FirebaseAuth;import com.test.firebase.utils.Constants;import com.test.firebase.utils.DevicePreferences;public class MainActivity extends AppCompatActivity {  private FirebaseAuth mAuth;  private Button generateToken;  private FirebaseAuth.AuthStateListener mAuthListener;  @Override  protected void onCreate(Bundle savedInstanceState) {    super.onCreate(savedInstanceState);    setContentView(R.layout.activity_main);    findViewById();    listeners();  }  private void findViewById()  {    generateToken = (Button) findViewById(R.id.buttonLogin);  }  private void listeners()  {    generateToken.setOnClickListener(new View.OnClickListener() {      @Override      public void onClick(View v) {        String firebase_token = new DevicePreferences().getString(MainActivity.this, Constants.FIREBASE_TOKEN);        Toast.makeText(MainActivity.this, firebase_token, Toast.LENGTH_SHORT).show();      }    });  }  @Override  public void onStart() {    super.onStart();//    mAuth.addAuthStateListener(mAuthListener);  }  @Override  public void onStop() {    super.onStop();//    if (mAuthListener != null) {//      mAuth.removeAuthStateListener(mAuthListener);//    }  }}
10. Create java class file name like this MyFirebaseInstanceIDService.java.
package com.test.firebase;import android.content.Context;import android.util.Log;import com.google.firebase.iid.FirebaseInstanceId;import com.google.firebase.iid.FirebaseInstanceIdService;import com.test.firebase.utils.Constants;import com.test.firebase.utils.DevicePreferences;/*** Created by sikander on 25/10/16.*/public class MyFirebaseInstanceIDService extends FirebaseInstanceIdService { Context context; private static final String TAG = "MyFirebaseIIDService"; @Override public void onTokenRefresh() { //Getting registration token String refreshedToken = FirebaseInstanceId.getInstance().getToken(); //Displaying token on logcat Log.d(TAG, "Refreshed token: " + refreshedToken); sendRegistrationToServer(refreshedToken); } private void sendRegistrationToServer(String token) { new DevicePreferences().addKey(this, Constants.FIREBASE_TOKEN, token); //You can implement this method to store the token on your server //Not required for current project }}
11. Create java class file name like this MyFirebaseMessagingService.java.
package com.test.firebase;import android.app.NotificationManager;import android.app.PendingIntent;import android.content.Context;import android.content.Intent;import android.media.RingtoneManager;import android.net.Uri;import android.support.v4.app.NotificationCompat;import android.util.Log;import com.google.firebase.messaging.FirebaseMessagingService;import com.google.firebase.messaging.RemoteMessage;/*** Created by sikander on 25/10/16.*/public class MyFirebaseMessagingService extends FirebaseMessagingService { private static final String TAG = "MyFirebaseMsgService"; @Override public void onMessageReceived(RemoteMessage remoteMessage) { //Displaying data in log //It is optional Log.d(TAG, "From: " + remoteMessage.getFrom()); Log.d(TAG, "Notification Message Body: " + remoteMessage.getNotification().getBody()); //Calling method to generate notification sendNotification(remoteMessage.getNotification().getBody()); } //This method is only generating push notification //It is same as we did in earlier posts private void sendNotification(String messageBody) { Intent intent = new Intent(this, MainActivity.class); intent.addFlags(Intent.FLAG_ACTIVITY_CLEAR_TOP); PendingIntent pendingIntent = PendingIntent.getActivity(this, 0, intent, PendingIntent.FLAG_ONE_SHOT); Uri defaultSoundUri= RingtoneManager.getDefaultUri(RingtoneManager.TYPE_NOTIFICATION); NotificationCompat.Builder notificationBuilder = new NotificationCompat.Builder(this) .setSmallIcon(R.mipmap.ic_launcher) .setContentTitle("Firebase Push Notification") .setContentText(messageBody) .setAutoCancel(true) .setSound(defaultSoundUri) .setContentIntent(pendingIntent); NotificationManager notificationManager = (NotificationManager) getSystemService(Context.NOTIFICATION_SERVICE); notificationManager.notify(0, notificationBuilder.build()); }}
For more information, you can download from this link https://github.com/sikander-kh/firebase